Every gardener dreams of having an arsenal of beautiful flowers, fresh for display, just steps from their back door. Creating your own raised beds for cut flowers is a simple, sustainable way to always have a bouquet of blooms (grown by your own green fingers) set on the windowsill or mantelpiece.
You don’t need heaps of space to grow cut flowers, so raised beds are the perfect solution for those with a petite backyard – or one already chocka with foliage. And the best bit? You can grow anything in a raised bed that you’d grow in your border.
It’s easy to build a raised bed; read on for Rhino Greenhouses Direct’s how-to guide and top tips.

What are cut flowers?
Whilst we love the local florist, the cost of keeping a vase of flowers on the windowsill can soon add up. By making your own raised bed for cut flowers, you can save some pennies and feel the joy of growing, arranging and displaying your handiwork.
One of our Favorite things about planning your raised bed for cut flowers is that the combination is at your fingertips. Whether you adore sunflowers or baby’s breath, you can choose your Favorite blooms. Planning the color combinations is all part of the fun, so prepare to sit down with your seed book. Plus, you get to change your style with the seasons.
You’ll also have hours of fun creating your own bouquet arrangements. And when your blooms have tired, you can have a go at drying them, too, so they’ll keep bringing joy for months to come.
How to build a raised bed
Now that we’ve sung the praises of building raised garden beds for cut flowers, here’s how to start.

Step 1: Consider your space…
The good thing about raised beds is that you don’t need much of a garden. That being said, you should be considerate of where you’re planting. Your chosen spot should ideally get 8 hours of sunlight each day to give your plants what they need to grow. Consider how your garden changes with the seasons, too, and if any factors, such as trees, will block out essential light during the summer months.
Step 2: Think of the size…
Your raised bed can be as big or as small as you like, though 1.2m is a great average width, as this means you can reach the middle without stepping on the soil. It must also be at least 8 inches deep to allow for a healthy root system. If you’re building more than one raised bed together, plan to space them 50 cm apart so that you can still get your wheelbarrow or lawnmower in between.
Take your time to plan from different perspectives and use a piece of landscape fabric to test out potential spots.
Step 3: Choose your materials…
Another great thing about raised beds is that they can be made from almost anything. You can buy pre-made beds to simply pop in your garden and fill. We recommend our aluminum raised garden beds. Alternatively, you can have a go at making your own.
If you decide to make your own, choose a wood that will stand the test of time. Cedar wood will last around 10 years, but as a general rule, the thicker the board, the longer it will last.
Then, think about the aesthetics. As your raised bed will be grown to be harvested, it might not always look its best. You can counter this by up keeping the boundary; consider painting your bed boldly or using a finished wood.
Step 4: Dig and fill…
When preparing the soil for a raised bed, we like to lift the top layer of turf, giving it a good shake out, and then flip it. We then add a layer of cardboard to stop weeds from growing (this will eventually be eaten up by worms). Then, we add 8 to 10 inches of soil.
The best mixture is two parts of topsoil with one-part green mulch. This creates a solid environment for your plants to take root. If you want a richer growing environment, you can also try mixing in one part manure.
Let the soil settle for a couple of days before you begin planting.
Step 5: Get planting…
Once your raised bed is built, you can plan and divide your beds. Try to leave 12 inches between species to avoid overcrowding. Consider the maximum growth height of each plant when spacing – for example, taller flowers will shadow smaller flowers and should be spaced accordingly.
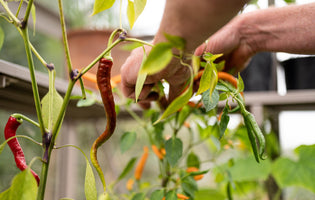
Now, get picking! Some easy-to-grow flowers for cutting are snapdragons, calendula, baby’s breath, zinnia and gladiolus. You can add a sweet scent to your garden with herbs like mint, lemon balm, and basil.
Top Tips for Raised Garden Beds
Be aware of the growing needs of each species. It’s not a good idea to put a tall growing flower like a sunflower next to a short-growing flower as the small species will not get enough sunlight.
If you have a deep base and want to save money on soil, fill the bottom of deeper beds with natural materials like wood logs, sticks and leaves.
Planting veggies? Your raised bed will need to be deeper - plan for 12 to 18 inches to give the roots space to thrive. Remember that some vegetables like parsnips and pumpkins need a deep root depth of around 36 inches!
Other than that, break out your seed book and start planting. It won’t be long before your windowsill is brimming with freshly cut blooms grown in your very own garden.